

#
License Server Quick Start
This tutorial creates a new website, completes first-run setup, adds the minimum business records and creates a license file.
No programming is required. You need:
- IntelliLock and a valid IntelliLock license;
- the
.ilprojfile used to protect your application; - a Windows web server with IIS and ASP.NET 4.8;
- permission to upload files and change the
App_Datafolder permissions; and - a password manager for the administrator and database passwords.
If you do not manage the web server yourself
Ask your hosting company to complete the IIS configuration. You can still perform the browser setup and daily license work yourself.
#
1. Prepare the IntelliLock project
Open the .ilproj file that is also used to protect the application. The master
key in this project must match the protected application. Save the project before
creating the website.
The .ilproj is important: it proves that licenses belong to your protected
application. Do not use a project from another product.
In IntelliLock, open License Server and select Create License Server Website.
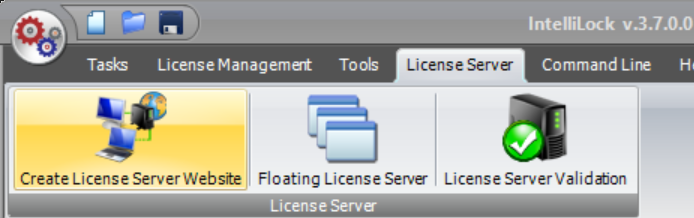
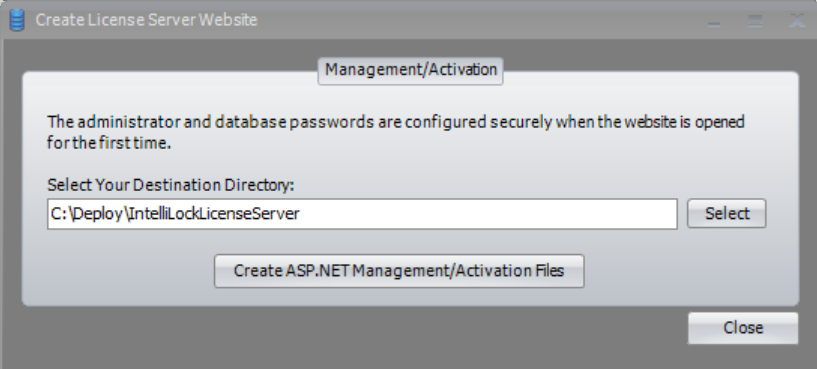
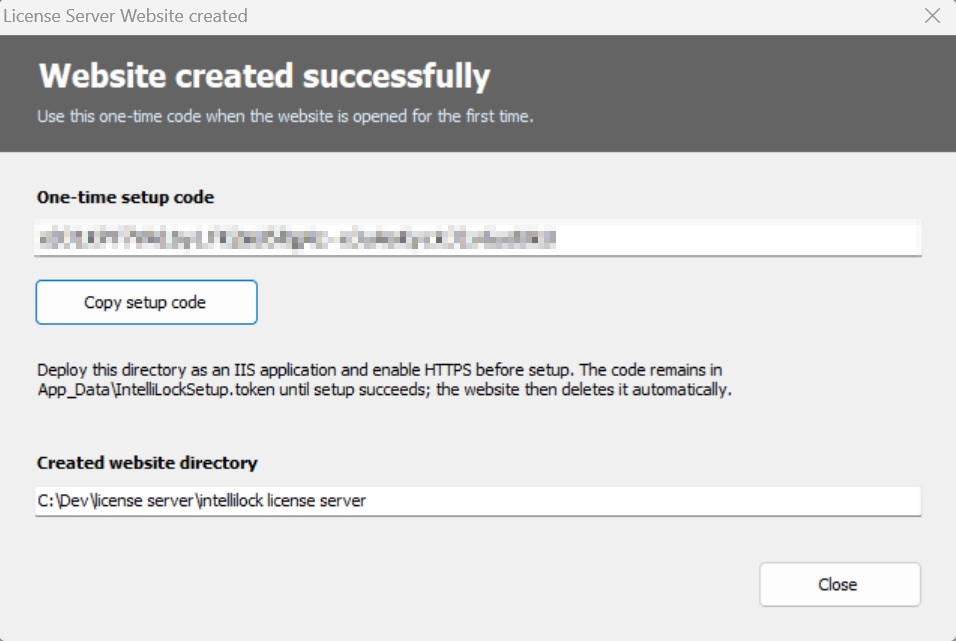
Choose an empty destination directory. IntelliLock creates the complete website,
places a private copy of the current project in App_Data, and displays a
one-time setup code. Copy that code and store it temporarily.
#
2. Publish the website to IIS
Copy the contents of the generated website directory into the root of a new IIS
application. Configure the application pool for .NET Framework 4.x, Integrated
pipeline mode and 64-bit execution. Grant its identity Modify permission on
App_Data.
In simple terms, the website must be allowed to create and update files inside
App_Data. If it cannot, setup will fail.
Do not copy the source-development App_Data directory. Use only the directory
created by IntelliLock or the official deployment package.
#
Easy local test with Visual Studio
For a first test on your development computer, you do not need to configure a separate IIS website:
- Start Visual Studio.
- Select File > Open > Web Site.
- Select the complete website folder created by IntelliLock.
- Start the website with F5 or Start.
- Visual Studio opens the local website in a browser. Complete the same first-run setup described below.
Open the website folder itself, not an individual .aspx file. Keep the
generated App_Data folder inside the website.
This is a convenient way to test setup, license creation and the service URLs. It is not a production deployment. For customer access, use a properly configured IIS application with HTTPS, persistent storage and backups.
#
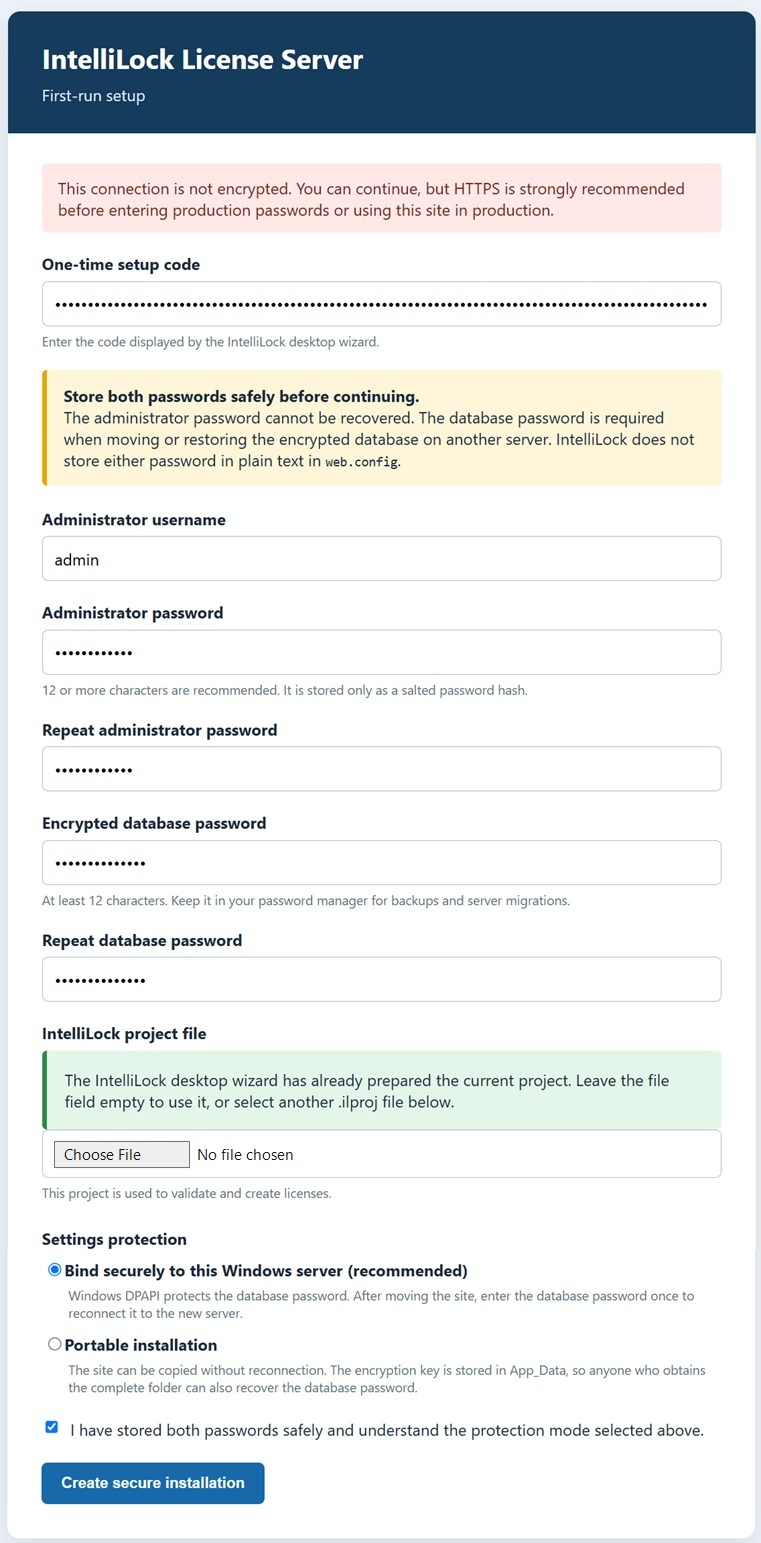
3. Complete first-run setup
Open the website in a browser. An unconfigured installation redirects to
Setup.aspx.
- Enter the one-time setup code when requested.
- Choose an administrator username and password.
- Choose a separate database password of at least 12 characters.
- Keep the prepared project selected, or upload another matching
.ilproj. - Select Bind securely to this Windows server unless portability is a specific requirement.
- Store both passwords in a password manager.
- Select the acknowledgement and choose Create secure installation.
The HTTP warning is informational and does not block setup. Use HTTPS before entering production credentials over an untrusted network.
#
4. Sign in and verify health
Sign in with the administrator account. The Management dashboard automatically runs a cached read-only consistency check. Open System Health if a warning is shown and resolve missing project files or invalid relationships before issuing licenses.
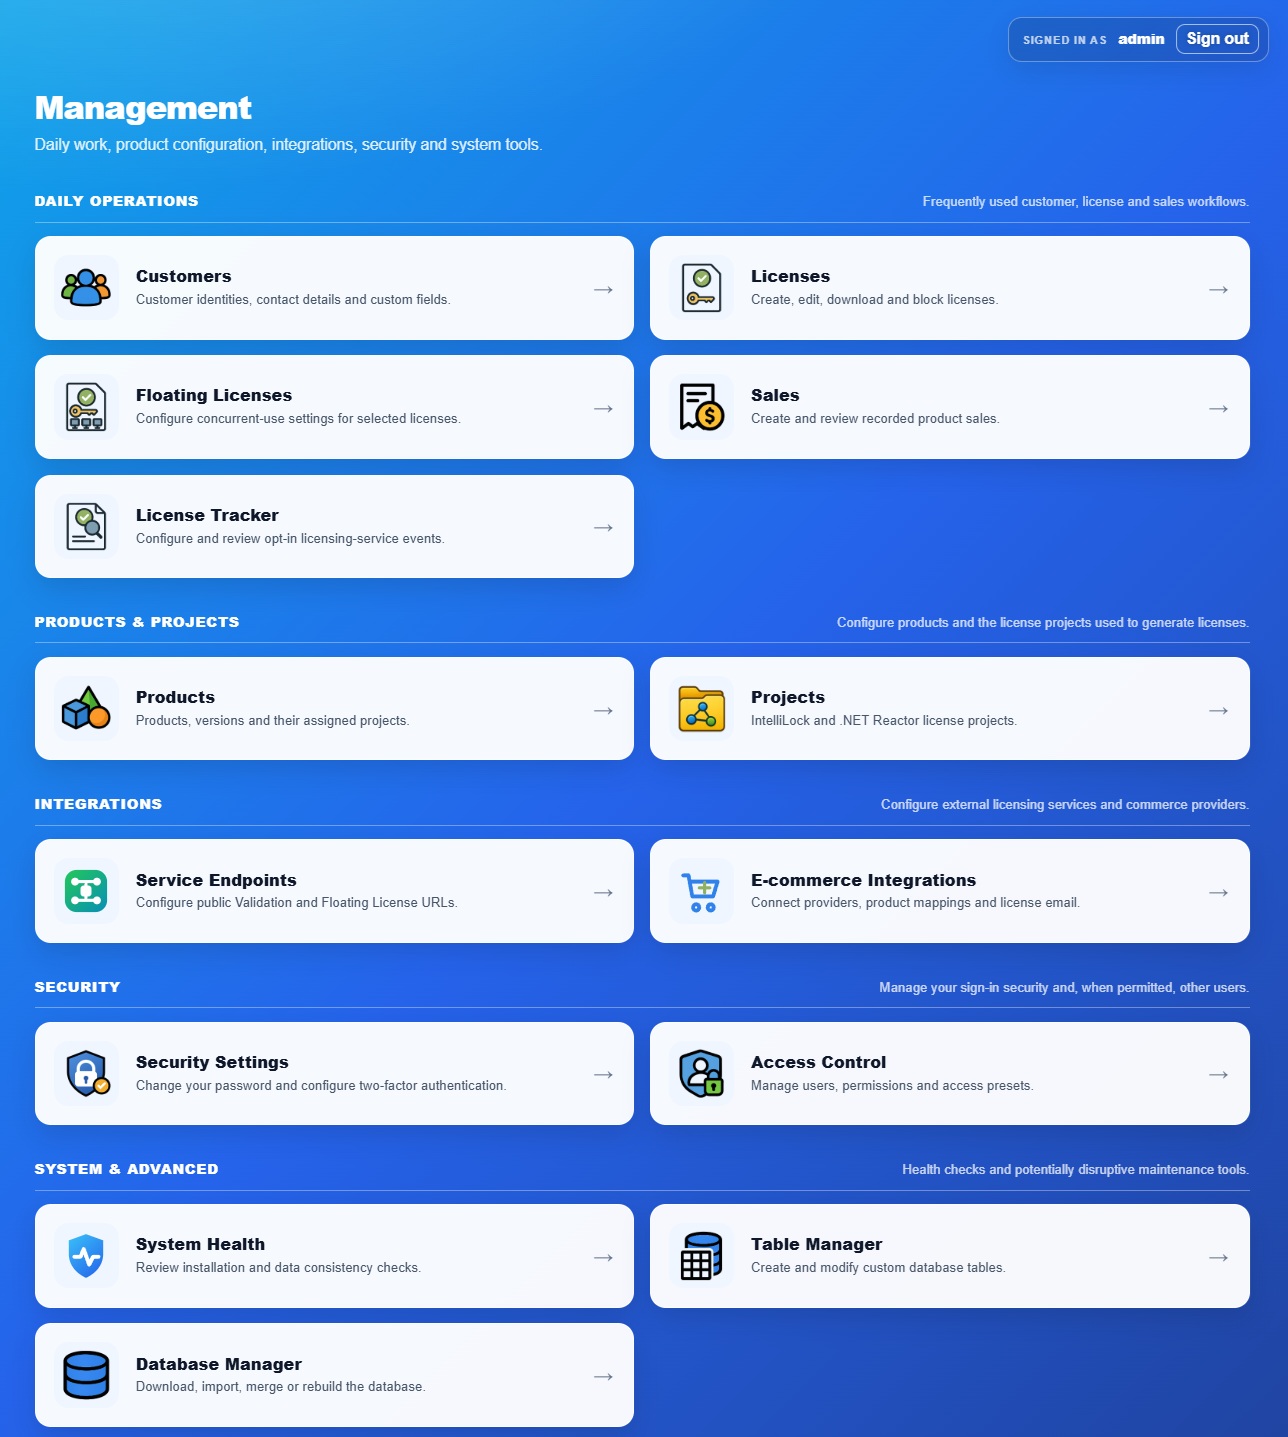
You are ready for normal use when:
- you can sign in;
- System Health shows no critical problem;
- the prepared Project exists; and
- the dashboard opens without a setup or migration message.
#
5. Add the first records
Create records in this order:
- Projects — confirm that
ProjectFilePathpoints to the prepared project file relative toApp_Data. - Products — select the project used to create the product's licenses.
- Customers — enter at least a name or company that identifies the customer.
- Licenses — select the customer and product, set the license type and validity, then save the row.
Use the row's Create License action to download the license file. Open the adjacent ▼ menu and choose Show IDs when stable CustomerID, ProductID, ProjectID or LicenseID values are needed for manually created license information. Show details displays the current record and its related Customer, Product, Project or License records without entering edit mode.
For normal website use you do not need to type or remember these IDs. Pickers select the correct record for you.
#
6. Configure validation or floating licensing
- For normal online validation, continue with License Server Validation.
- For concurrent-user licensing, continue with Floating Licensing.
- To use separate URLs for multiple projects, configure Service Endpoints.